Hardstand and Manoeuvring Space
Hardstand and Manoeuvring Space
One of the biggest mistakes in playground accessibility design is focusing only on the equipment while ignoring the space around it.
True accessibility is not just about reaching a playground item.
It is about whether a child can safely approach it, position themselves comfortably, manoeuvre independently, participate confidently, and move away again without unnecessary barriers.
That is where hardstand areas and manoeuvring space become critically important.
Accessibility Is About Movement
For many disabled children and adults, movement through a playground can be just as challenging as the equipment itself.
Wheelchairs, powerchairs, walking frames, mobility scooters, and other mobility aids all require:
Stable surfaces
Turning space
Predictable pathways
Clear circulation areas
Safe transitions
Sufficient approach zones
Without these elements, even expensive “accessible” equipment may become difficult or impossible to use independently.
What Is Hardstand?
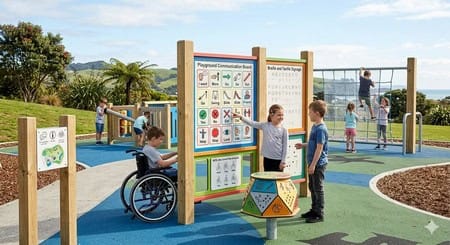
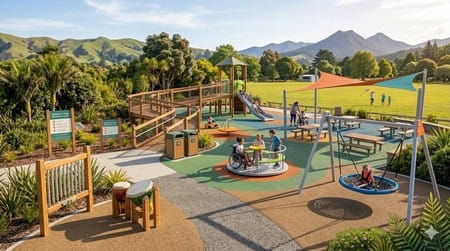
A hardstand is a firm, stable, accessible surface area positioned around playground equipment and circulation pathways.
Hardstand areas help provide:
Wheelchair positioning space
Transfer areas
Turning circles
Safer mobility access
Stable seating and waiting areas
Improved circulation between equipment
Hardstand is particularly important around:
Wheelchair-accessible swings
Inclusive seesaws
Transfer platforms
Carousel equipment
Sensory play areas
Social seating zones
Accessibility does not stop at the edge of the equipment.
Manoeuvring Space Matters
Many playgrounds technically include accessible pathways but fail to provide enough space for real-world movement.
This is especially true for:
Larger powerchairs
Rear-loading wheelchairs
Children requiring support workers
Mobility scooters
Families moving together through spaces
A wheelchair user may physically reach an item yet still be unable to position themselves correctly to participate safely.
This is where manoeuvring space becomes essential.
Children should not feel trapped, restricted, or dependent on others simply because circulation space was overlooked during design.
Powered Wheelchairs Change the Design Brief
One major issue often overlooked in playground design is the difference between manual wheelchairs and powered wheelchairs.
Powerchairs are often:
Heavier
Longer
Wider
Less agile in tight turning spaces
More sensitive to uneven surfaces
More affected by soft edges and abrupt transitions
Some powerchairs require much larger turning circles and clearer access zones than designers initially anticipate.
Accessible design should reflect real-world equipment sizes, not minimum assumptions.
Accessible Surfacing and Hardstand Work Together
Hardstand areas are only effective when combined with genuinely accessible surfacing.
Loose-fill bark remains one of the biggest barriers to independence within many playgrounds.
Bark:
Shifts under wheels
Creates unstable movement
Traps small castors
Forms ruts and soft spots
Increases fatigue
Limits independent movement
Creates trip hazards
For many disabled users, bark effectively becomes a barrier rather than a play surface.
Accessible surfacing systems provide:
Smoother movement
Safer circulation
Predictable traction
Improved turning ability
Better transfer access
Reduced physical strain
The space around the equipment is often just as important as the equipment itself.
Accessibility Should Feel Natural
Good inclusive design should feel effortless.
Children should not need complicated positioning, lifting, assistance, or constant supervision simply to use basic playground features.
Well-designed manoeuvring space allows:
Side-by-side participation
Easier transfers
Social interaction
Independent movement
Safer circulation for carers and families
This creates playgrounds that feel welcoming rather than restrictive.
Families Need Space Too
Accessibility is not only about the child using the equipment.
Families, carers, grandparents, and support workers also need room to move comfortably and safely through public spaces.
Inclusive playgrounds should consider:
Seating access
Stroller movement
Mobility parking connections
Accessible toilets
Resting zones
Shade areas
Circulation around busy equipment
If families cannot comfortably navigate the environment, inclusion has not truly been achieved.
Compliance Does Not Always Mean Usability
One of the biggest problems in accessibility design is the gap between technical compliance and real-world usability.
A playground may technically satisfy standards while still being difficult for disabled people to use in practice.
Small design decisions can create major real-world barriers, including:
Narrow circulation routes
Poor turning space
Trapped castors
Raised edges
Abrupt transitions
Inaccessible approach angles
Insufficient transfer zones
This is why lived experience matters so much in inclusive playground planning.
Lived Experience Improves Design
Disabled people and families often identify practical accessibility issues that are missed during standard planning and procurement processes.
Something may appear accessible on paper while functioning very differently in real life.
Real-world lived experience helps identify:
Difficult turning spaces
Unsafe circulation areas
Problematic surfacing
Inaccessible equipment positioning
Transfer difficulties
Mobility bottlenecks
These insights help create playgrounds that work better for everybody.
Designing for Dignity
At its core, hardstand and manoeuvring space are about dignity, independence, and participation.
Disabled children should not have to fight their way through public spaces simply to join in play.
Inclusive playgrounds should allow children to:
Move confidently
Participate independently
Socialise naturally
Explore safely
Feel welcomed within their community
Because true accessibility is not just about being able to enter a playground.
It is about being able to fully participate once you are there.